Crank, head and block off for servicing.
With less than a month to go, its getting nerve wreaking.
Tuesday 3 July 2012
Monday 25 June 2012
Rest night
I think tonight's going to be a rest night. I am pretty tired, additionally, my right hip's been killing me.
Got quite alot done last week. Stripped the engine, finished the cockpit etc etc. Read on.
-------------------------------------------------------------------------------------------------
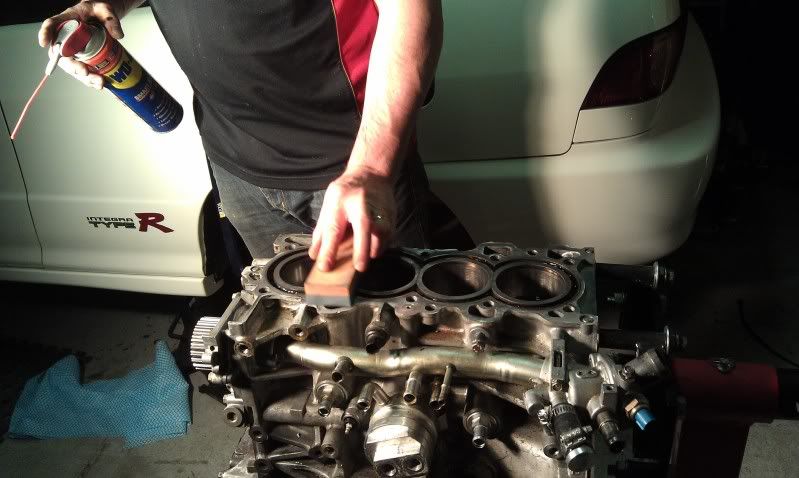
Engine:
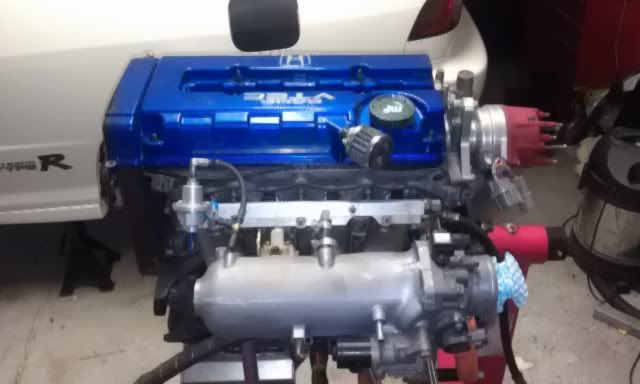
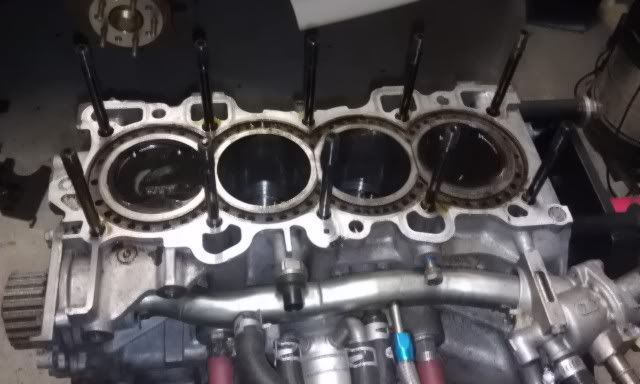
Although the engine's has been running fine (on the past 2 occasions I drove the car), I did find a couple of small globules of oil in the radiator. So the idea was to strip it and check out the head gasket - well, that and also to see if I can fix the crank.
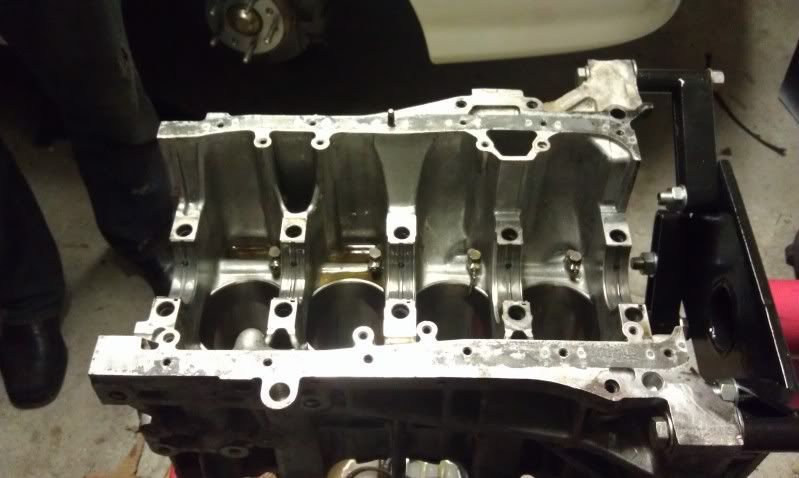
First thing when the pistons came off, the bores were in really good condition. However, the head for some reason wasn't complete flat.
Here's using a sharpening stone to id high points.
Well, that gonna need machining to get it flat. So off to the machinist with that.
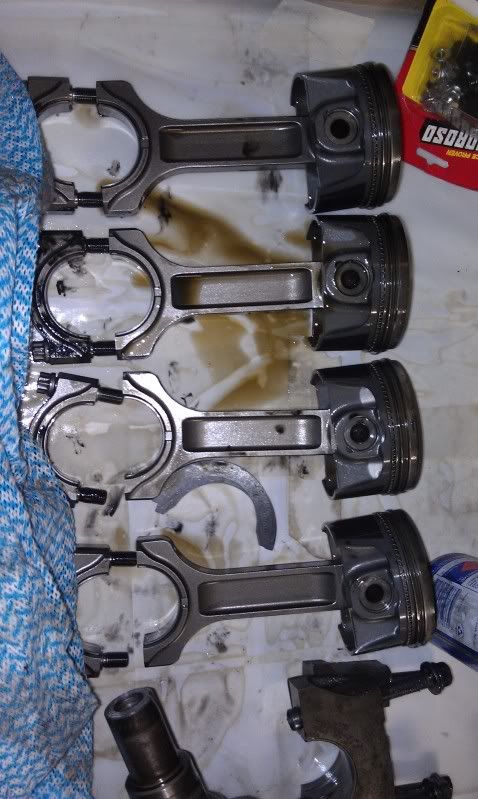
Pistons, rings and all bearings look pretty good with no sign of detonation.
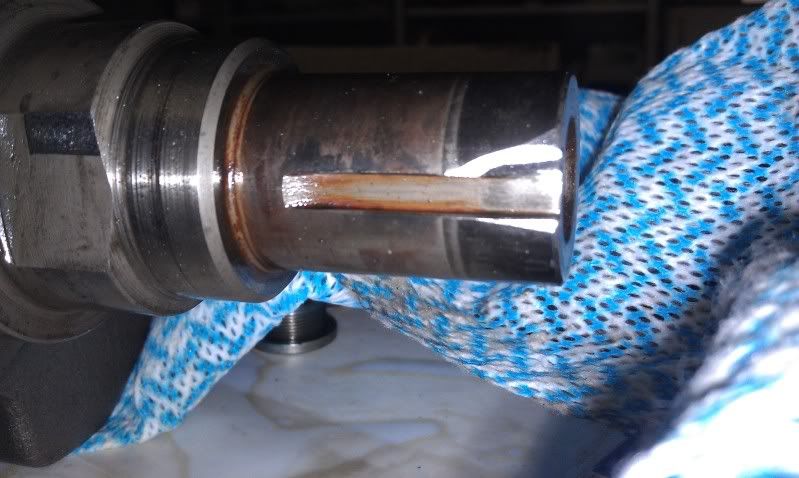
Crankshafts gotta come out.
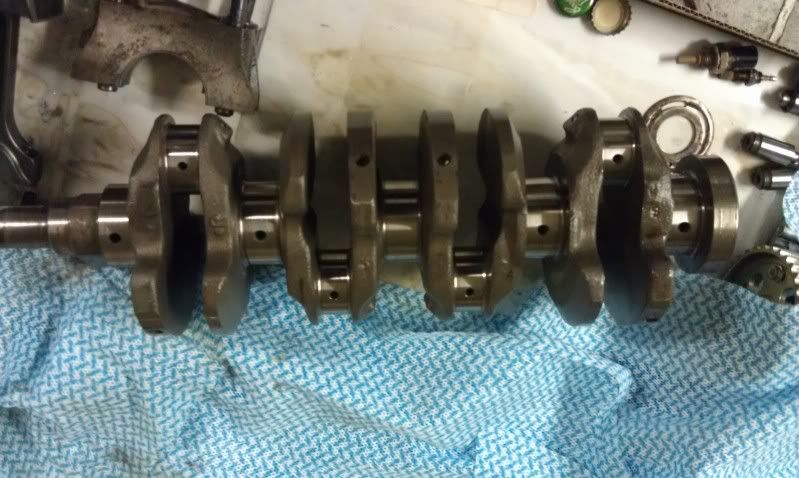
The issue with the crankshaft mentioned earlier was a chipped keyway.
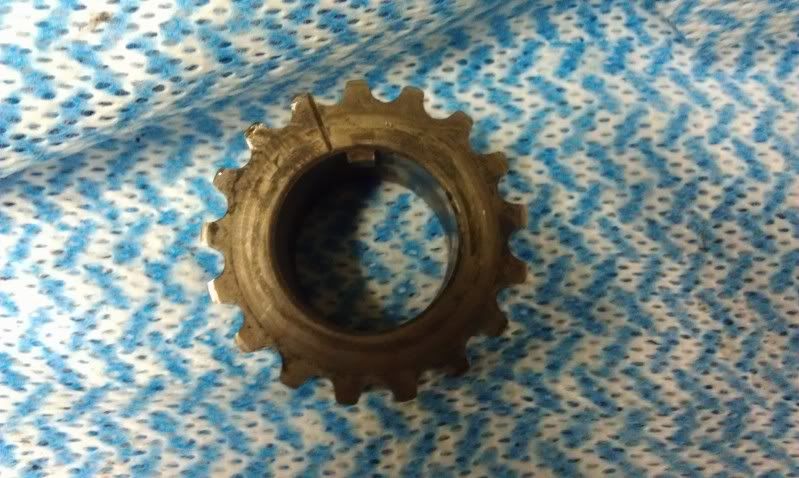
To resolve this, I'm taking the solution from dai-16T on Ozhonda. An extended keyway, a machined timing belt pulley (sorry, can't locate a USDM unit). An extended woodruff key is on its way from the UK! and from the alternator of a 1945-1983 Triump. Yay.
So, what next, probably get new bearings since the engine is out, a thicker head gasket..have to search for this...Ebaaaayyyyyy..
I swear more than 3/4 of the items on this car were bought off Ebay. Its just so convenient to have things delivered straight to you especially when time poor - and the prices are pretty competitive too.
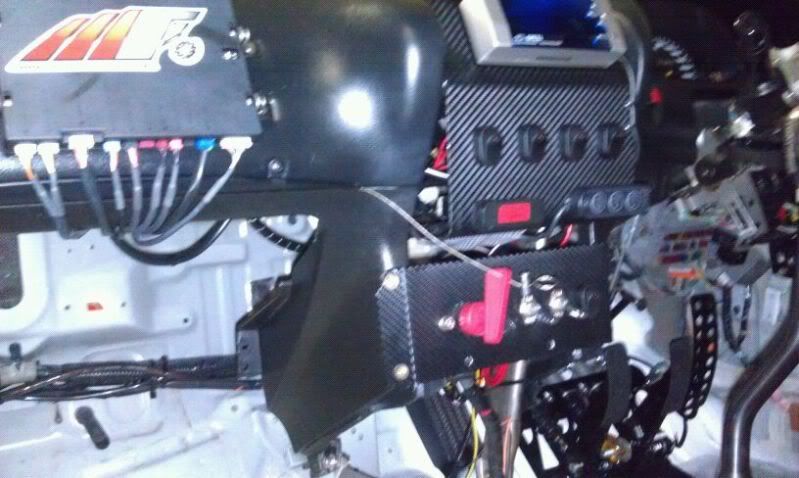
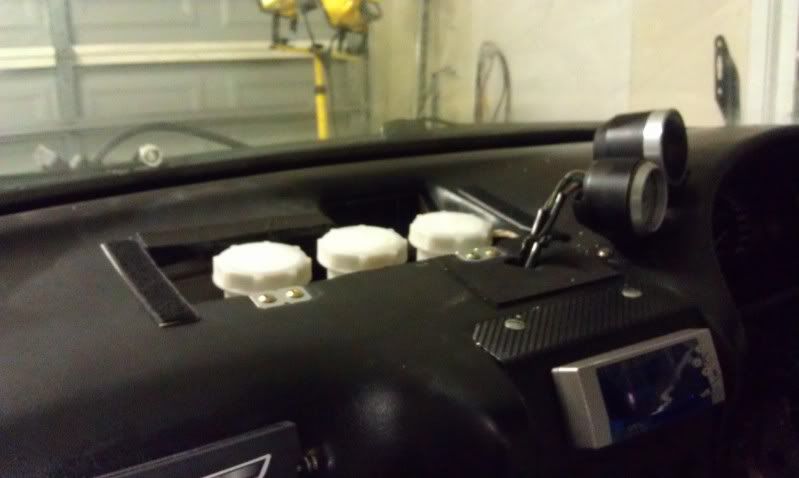
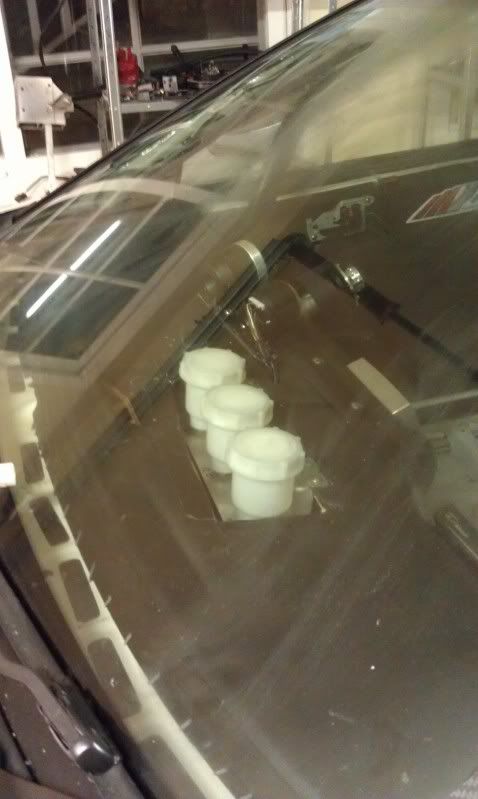
The driver's seat
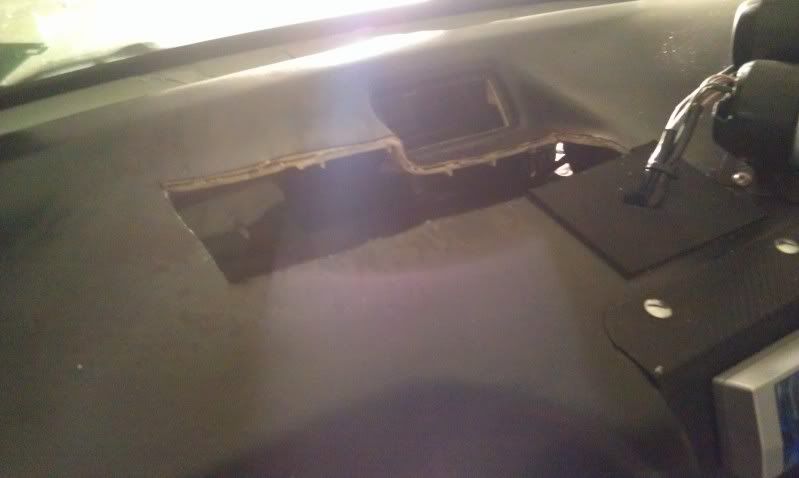
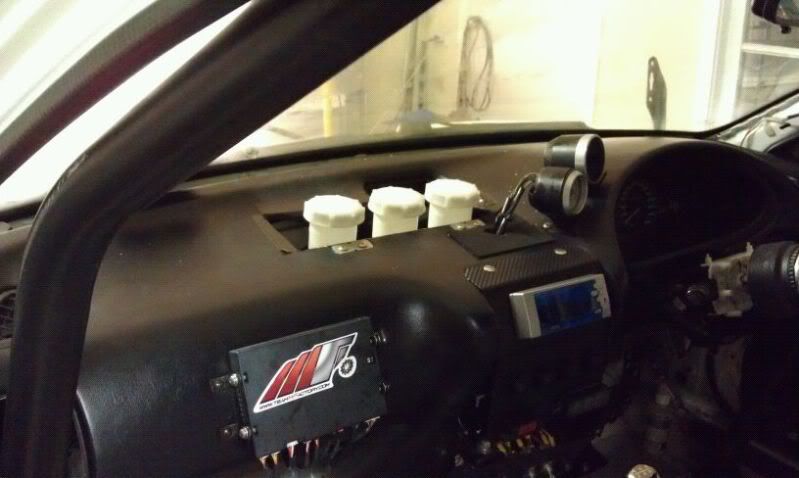
While waiting for the engine and head bits, I decided to finish up the cockpit - and always wanted to wire up the defi advance system so its within easy reach instead of somewhere on the dash.
Underneath the defi unit is the brake bias adjuster.
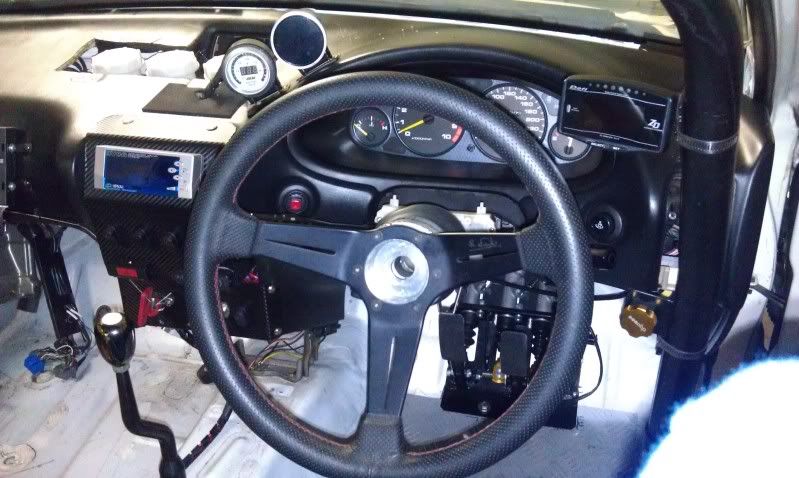
Thanks Ten for the beaut of a steering wheel.
Mounted the seat and the harness.
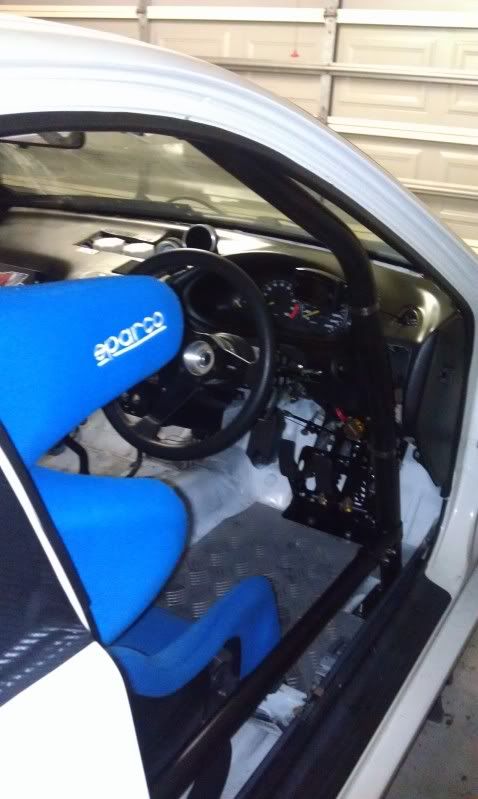
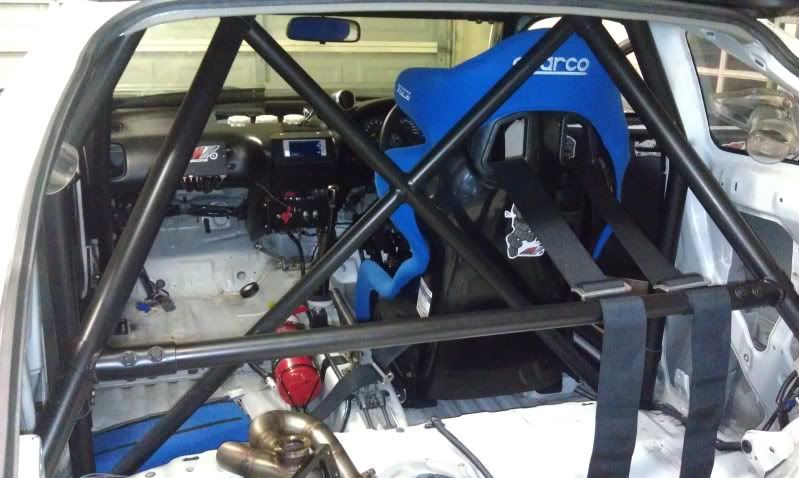
This is a first for me, usually the seat goes in on the day before any event and the harness adjusted on the 2nd run of the day after finding out on the 1st run that the buckle is close to my neck.
-------------------------------------------------------------------------------------------------
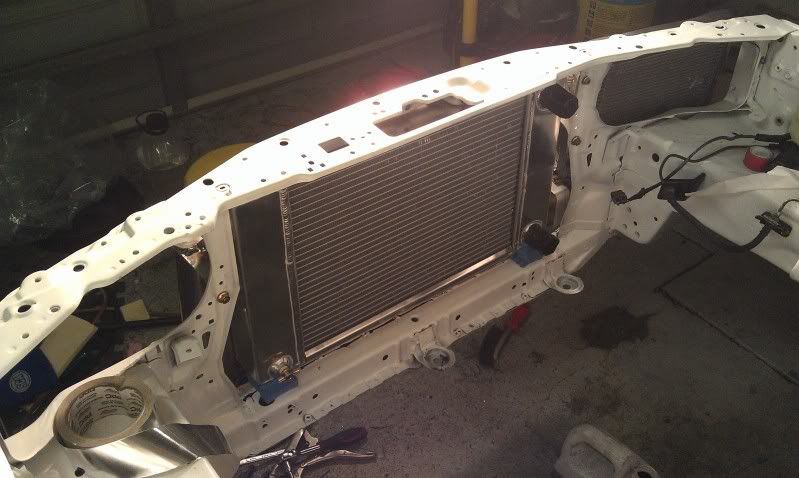
and finally, yesterday...
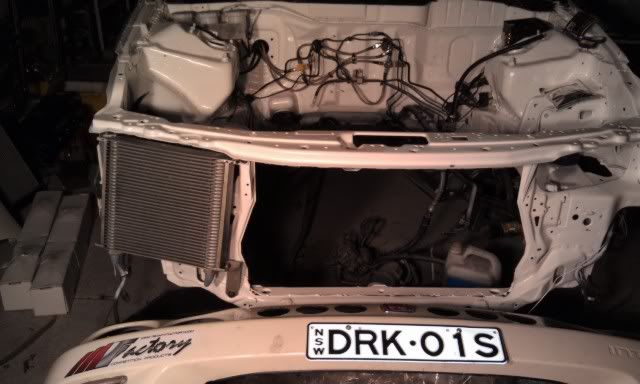
I started work on mounting the radiator and intercooler.
I swear the best tool I've bought is the welder, well the air compressor too I guess.
So, this is how the radiator mounted from the back.
The front
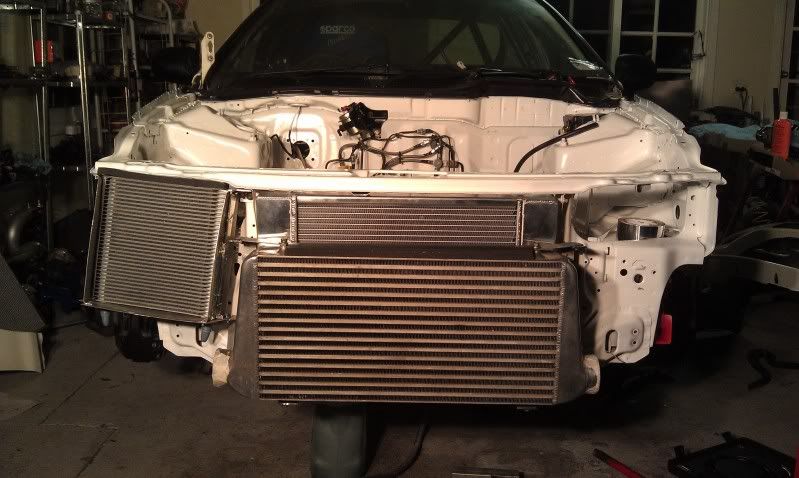
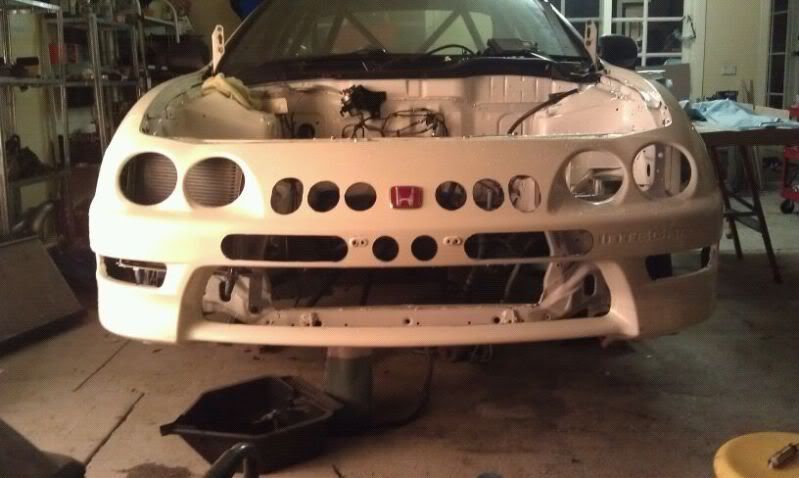
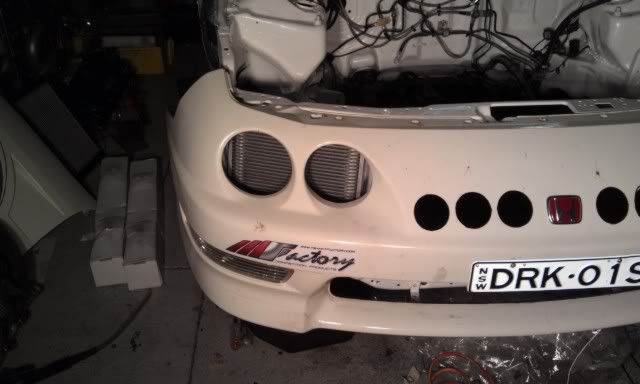
With the bumper on...
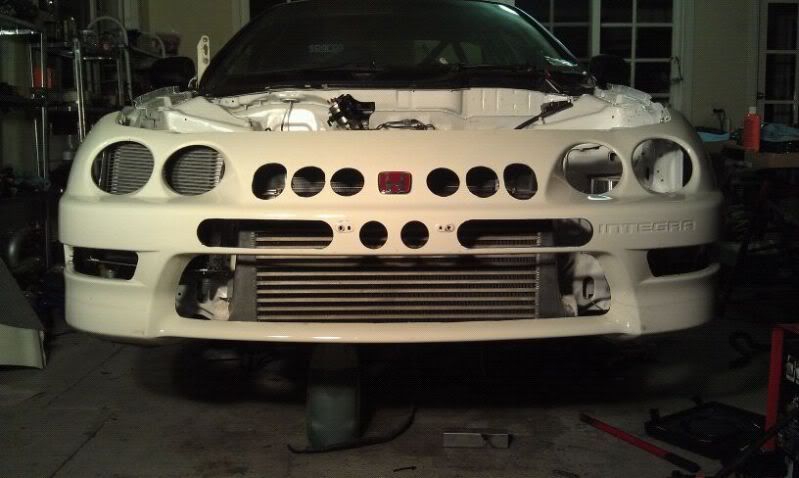
Come to think of it, I probably have overkilled on the holes in the bumper. There's gonna be some serious blocking off to ensure that air goes where its supposed to go.
Watch this space.
Wednesday 20 June 2012
21st June
It certainly feels like we're going to be able to the car ready on time.
Sometimes its very frustrating when certain things cannot be done due to the lack of motivation. Talk is cheap, actions speaks louder than words. There's alot invested in this project, both time and money.
Anyway, head is getting serviced, there might be some issue but hopefully can be resolved.
Tagged the roll cage to the B pillars today, hopefully will lend extra strength.
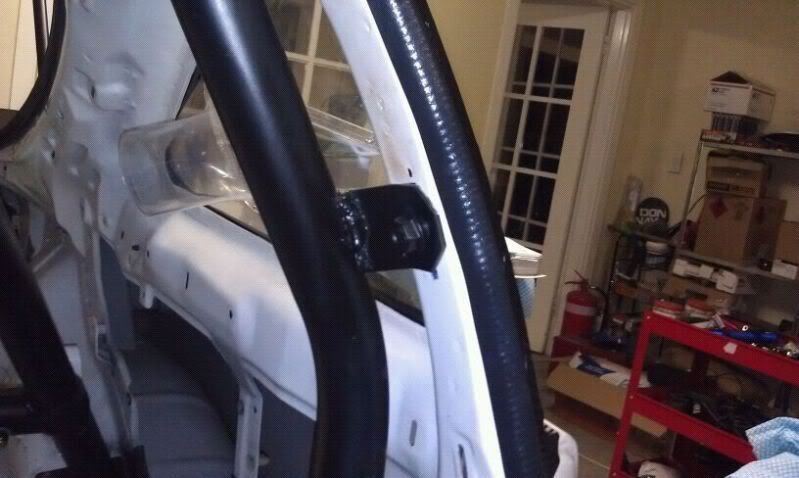
Also, wired up the external kill switch.
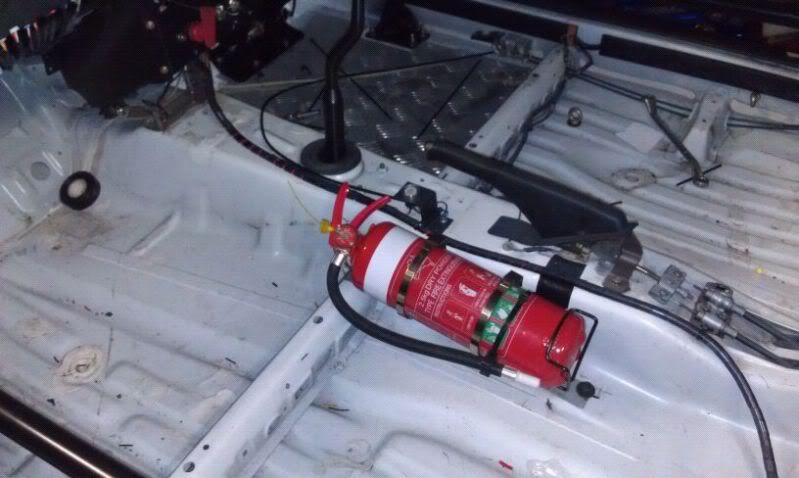
and finally, a 2.5kg fire extinguisher - probably overkill as CAMS only requires a 1kg. However, I would rather take a small weight penalty and have some an extinguisher with 4 times the knock-down power of a 1kg one.
Sometimes its very frustrating when certain things cannot be done due to the lack of motivation. Talk is cheap, actions speaks louder than words. There's alot invested in this project, both time and money.
Anyway, head is getting serviced, there might be some issue but hopefully can be resolved.
Tagged the roll cage to the B pillars today, hopefully will lend extra strength.
Also, wired up the external kill switch.
and finally, a 2.5kg fire extinguisher - probably overkill as CAMS only requires a 1kg. However, I would rather take a small weight penalty and have some an extinguisher with 4 times the knock-down power of a 1kg one.
Sunday 17 June 2012
Saturday 16 June 2012
Holy Holes Batman!
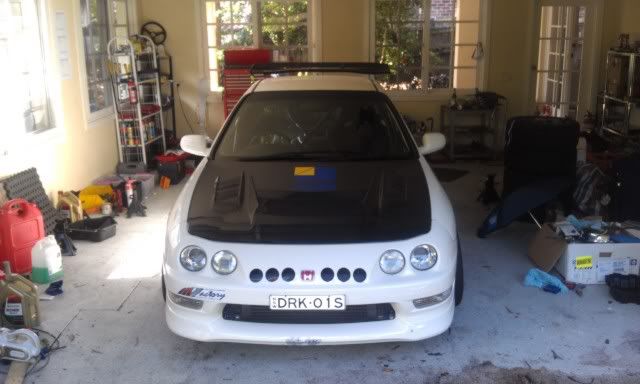
Today, I started on the body.
Went to Bunnings, sus'ed out what can be used for the Splitter. Plywood I guess.
I've been hearing that I should use anywhere from 12mm to 7mm.
The Marine Grade 7mm seems to be pretty stiff but was told that Bunnings can't get that in the large sheets that I need. Then again, do I really want to spend that much? Nah, I reckon the non structural 12mm plywood would do the trick - $30...I'll pick it up another day.
So while I was at Bunnings, I picked this up to do some general cutting. Have to trim some bumper and fender bits and having destroyed a couple of rotary tool already (including a dremel - which just couldn't take the heat from trimming fibre glass fenders.).
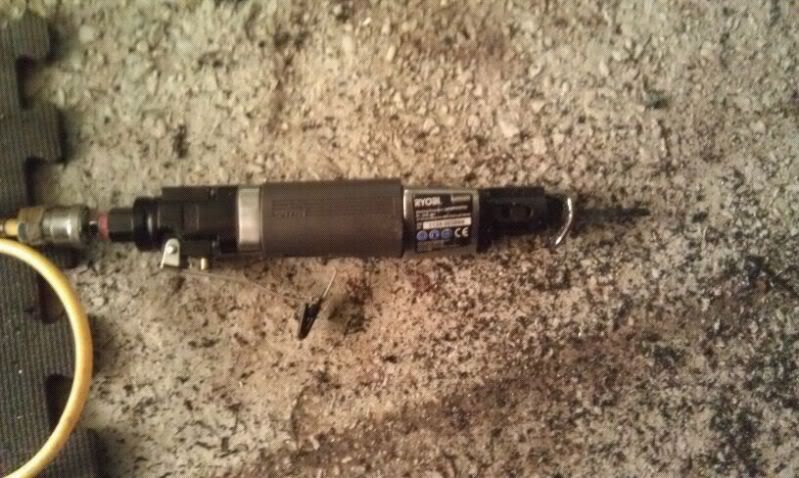
This tool worked like a dream.
I went from this...
To a little bit cleaned up and trimmed - this
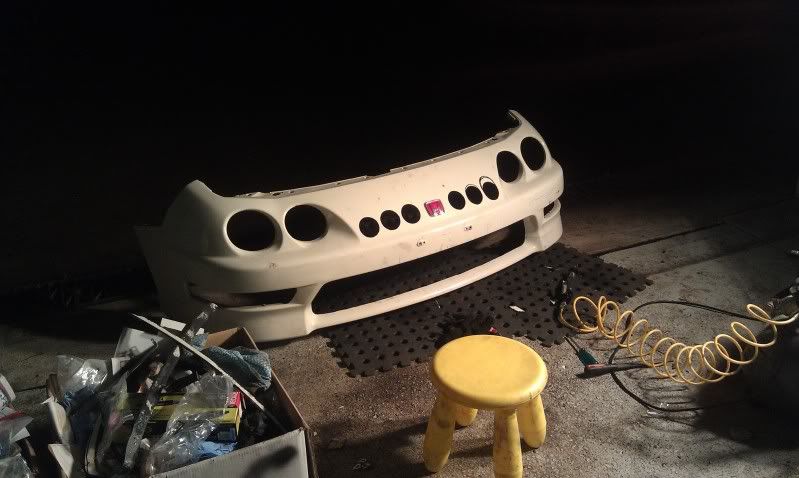
Then I looked over my shoulder and noticed my new set of hole drills..*Uh-Oh*
So, I ended up with this...I guess there's gonna be some ppl who will not like this... :-p
That should get enough air into the radiator. Have removed the lower lip as well as its not going to be needed when the splitter comes on.
--------------------------------------------------------------------------------------------------------
Back to the brakes.
The current position of the reservoirs have always bugged me.Actually, the way the lines ran from the reservoirs to the master cylinders have always bugged me.
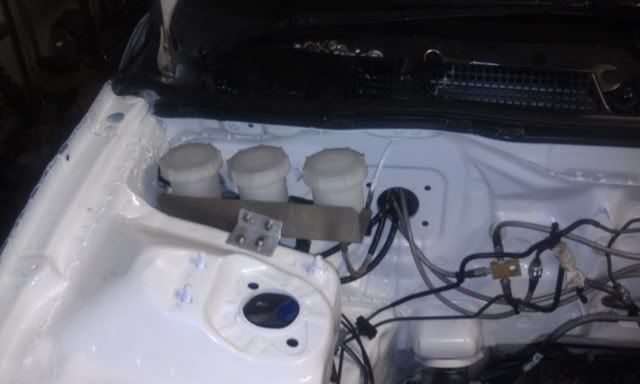
Because the supplied lines were a bit long, in its current position, it kinda looped to around the same height of the reservoir.

Rightly or wrong, I just had this feeling that the way its position could impede flow into the reservoir.
So had a long hard think about where to mount, well, I had the new saw tool anyway..soooo....
Solves the issue on the piping as well as keeping the reservoirs up high. Have already been told it looks dumb..but meh...don't give a flying f..k.
Went to Bunnings, sus'ed out what can be used for the Splitter. Plywood I guess.
I've been hearing that I should use anywhere from 12mm to 7mm.
The Marine Grade 7mm seems to be pretty stiff but was told that Bunnings can't get that in the large sheets that I need. Then again, do I really want to spend that much? Nah, I reckon the non structural 12mm plywood would do the trick - $30...I'll pick it up another day.
So while I was at Bunnings, I picked this up to do some general cutting. Have to trim some bumper and fender bits and having destroyed a couple of rotary tool already (including a dremel - which just couldn't take the heat from trimming fibre glass fenders.).
This tool worked like a dream.
I went from this...
To a little bit cleaned up and trimmed - this
Then I looked over my shoulder and noticed my new set of hole drills..*Uh-Oh*
So, I ended up with this...I guess there's gonna be some ppl who will not like this... :-p
That should get enough air into the radiator. Have removed the lower lip as well as its not going to be needed when the splitter comes on.
--------------------------------------------------------------------------------------------------------
Back to the brakes.
The current position of the reservoirs have always bugged me.Actually, the way the lines ran from the reservoirs to the master cylinders have always bugged me.
Because the supplied lines were a bit long, in its current position, it kinda looped to around the same height of the reservoir.

Rightly or wrong, I just had this feeling that the way its position could impede flow into the reservoir.
So had a long hard think about where to mount, well, I had the new saw tool anyway..soooo....
Solves the issue on the piping as well as keeping the reservoirs up high. Have already been told it looks dumb..but meh...don't give a flying f..k.
Saturday 9 June 2012
Nibbling away
Installed the oil cooler in the only other place I can think off where it's in the airflow.
Usually run the oil cooler right behind the Intercooler but now with a larger rad which will be pushed against the intercooler, this seems to be the other most logical space. Just don't drive the car at night, or hope there's no solar eclipse on the days it gets driven.
Later today (Yep, its sunday), I'll add ducting to ensure direct airlow onto the cooler.
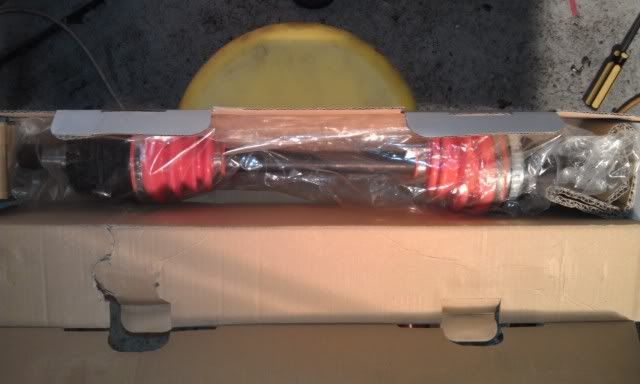
And oh, look! Drive Shafts, courtesy of MFactory
Usually run the oil cooler right behind the Intercooler but now with a larger rad which will be pushed against the intercooler, this seems to be the other most logical space. Just don't drive the car at night, or hope there's no solar eclipse on the days it gets driven.
Later today (Yep, its sunday), I'll add ducting to ensure direct airlow onto the cooler.
And oh, look! Drive Shafts, courtesy of MFactory
- Made from imported Japanese Steel
- Axle Shafts & 10% larger 6-Ball CV Joints Forged from High-Nickel Chromoly Steel & put through our proprietary heat treatment process
- Hollow center shaft core reduces rotational weight by 30%!
- High quality Silicone CV Boots to minimize the ripping or tearing normally associated with cheap rubber boots
- 100% OEM replacement/fitment and includes new ABS Rings
Started work on the engine
This week also saw work starting on the engine.
This is the bit that I'm most worried about - Not about touching the internals but more so of what this engine is. I just don't want to fuck it up. Fortunately Adrian's going to come around to help out. He originally built it anyway.
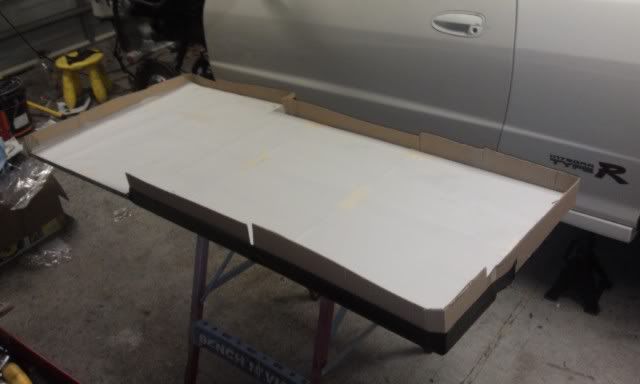
Step 1:
Prepare a table to store the parts.
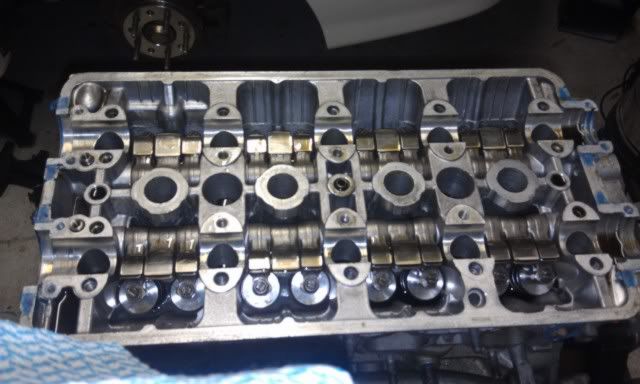
Step 2:
Dis-assemble the cams. Toda Spec Cs.
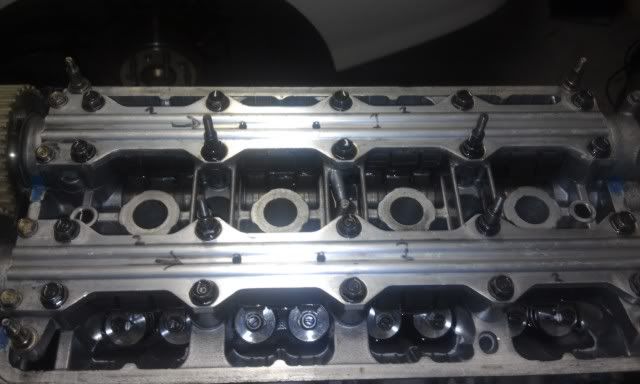
Step 3:
Un-torque the head.
and off comes the head
Finally, everything laid out nicely.
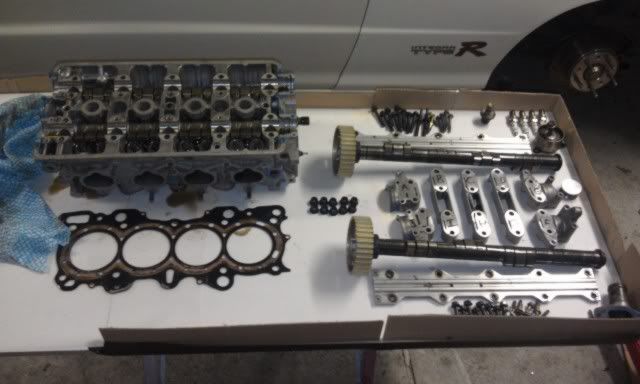
Next steps - clean up the block.
This is the bit that I'm most worried about - Not about touching the internals but more so of what this engine is. I just don't want to fuck it up. Fortunately Adrian's going to come around to help out. He originally built it anyway.
Step 1:
Prepare a table to store the parts.
Step 2:
Dis-assemble the cams. Toda Spec Cs.
 |
| Making sure everything is correctly marked for easier re-assembly. |
Un-torque the head.
and off comes the head
Next steps - clean up the block.
Subscribe to:
Posts (Atom)